


Get this freebie of the week! A set of girly character graphics, sized at 12" tall and 300 dpi. Perfect for so many projects! Use them in scrapbooking, digital crafts, branding and marketing or create physical goods to sell in your small business.
Tune in every week for a new freebie or sign up to receive the weekly freebies right in your inbox.
⬅ You'll find the email sign up right there in the side bar.
SMALL BUSINESS COMMERCIAL LICENSE - terms of use
Lovelytocu is a graphic design supply shop specializing in cute girly
character clip art. Our pre-made designs are ready to use and the
perfect addition to your small business branding and marketing, social
posts or creative projects with a diverse range of character styles.
Shop the current collection at www.lovelytocu.com and be sure to check out our current offers.
Get creative!
Shawnna


In this quick tutorial we're going to re-size one of my avatar PNG graphics and save as JPG ready to use as a profile pic on social media. Every site has different image size requirements and while some sites allow you to resize during the upload process, for many other sites, you'll need your image to be exactly the right size.
For this example, just to show you how to do it, I'm going to take a 400px square image and reduce it to 200px using the free online editor Pixlr.
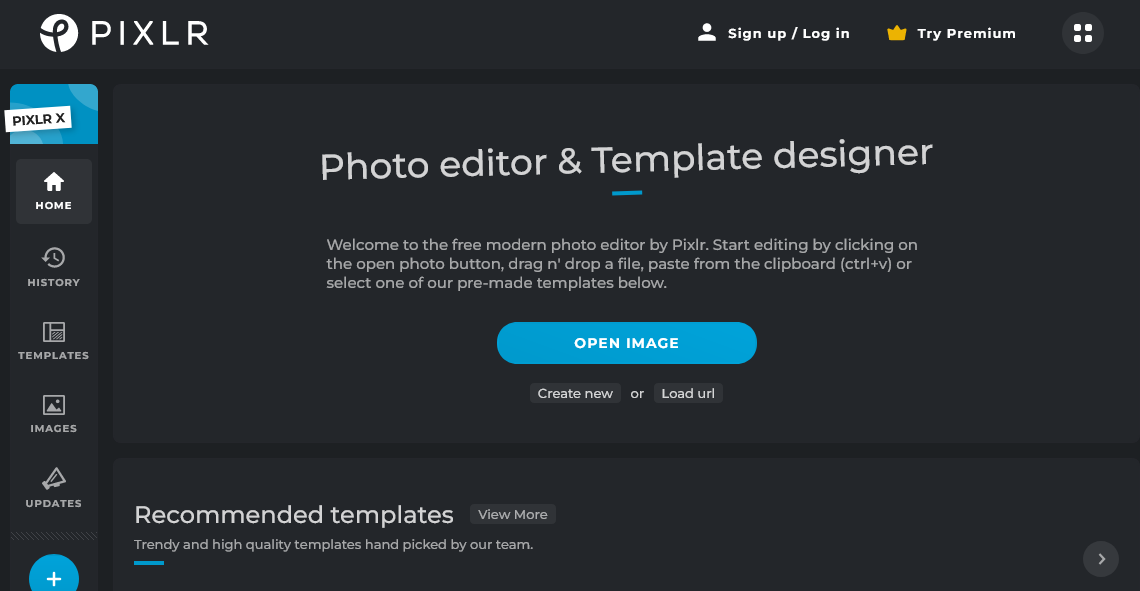
Start by opening your web browser and navigating to pixlr.com.
It will look like this:

STEP 1:
Let's get setup. Pixlr has two editor options. We're doing something very basic so let's use Pixlr X (on the left). Click this box and the editor will open up right on your screen.
It should look like this...
Now we need to upload our image. Click the "Open Image" button and navigate your computer files to find the image you want to re-size, select that file and click ok.
It will appear on your screen like so:

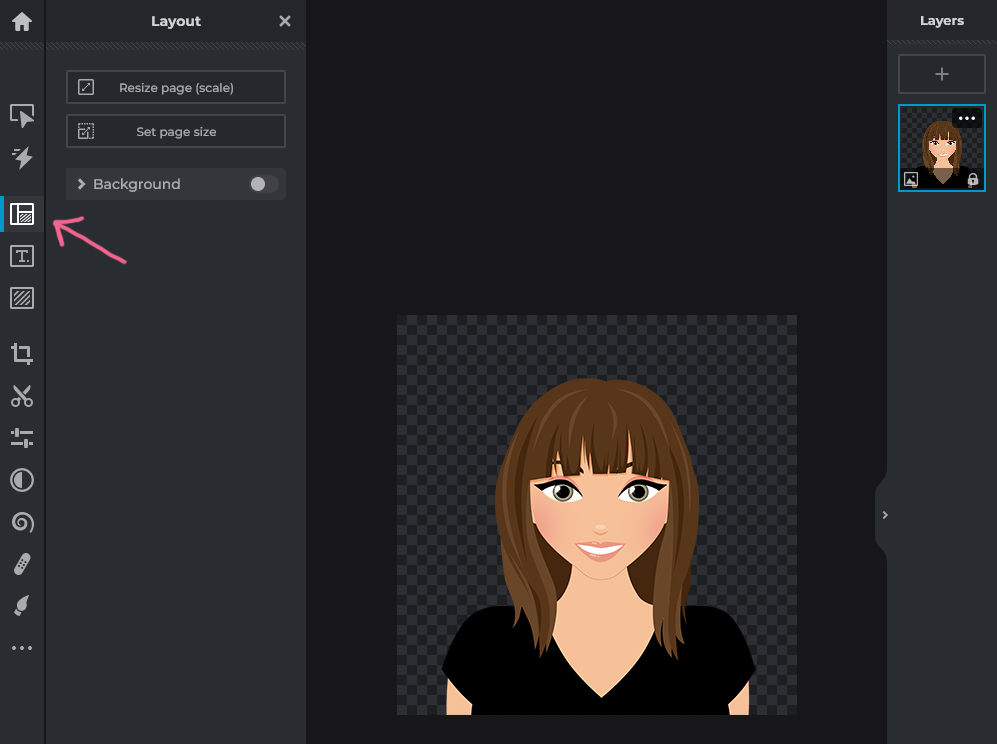
STEP 2:
To size the image we need to open the "Layout" box. This is the third icon down in the left hand icon menu. In this menu we want the "Resize page (scale)" option.
Click this button and another menu box will open where we'll make our adjustments.
STEP 3:
You should now see the following box, which tells you the current dimensions of the image measured in pixels.
Like so...

All we need to do here is change the number 400 to 200.
You'll see two toggle switches for constrain and smoothing. These should be on (blue) and left on, don't change these.
You also want to size DOWN, never size up on raster images like this or they will be blurry. Your screen should now look like the example below. Click apply to make the change to the image.

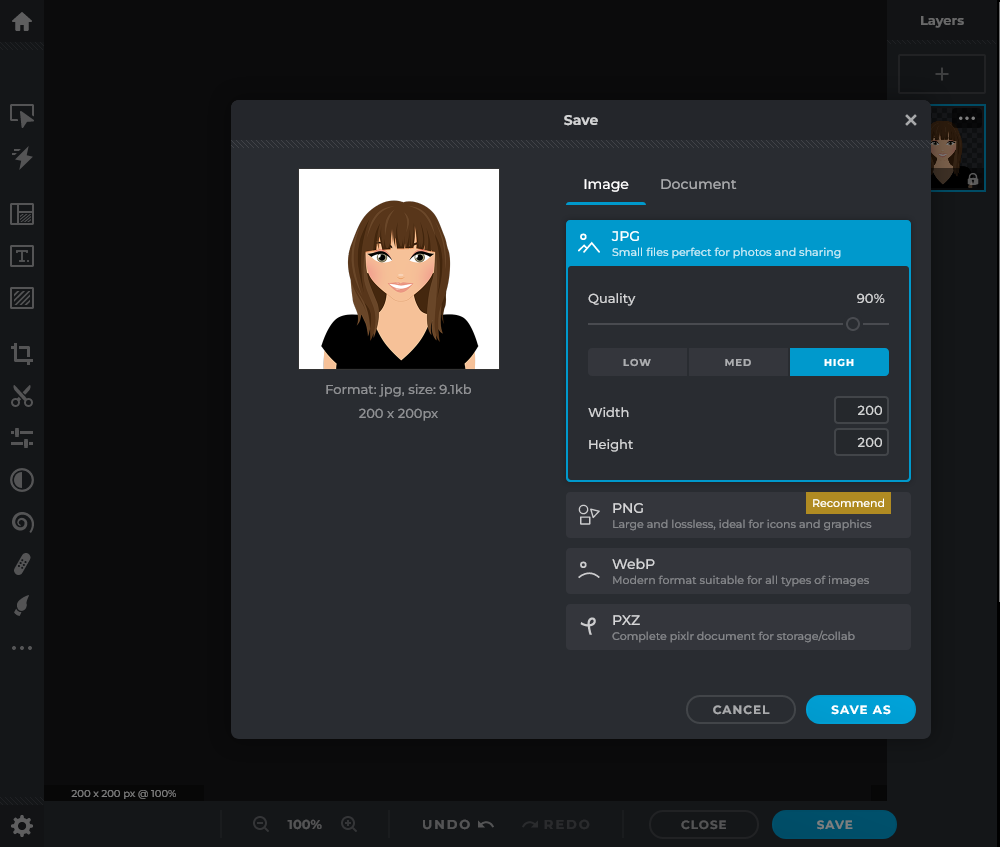
STEP 4:
All that's left to do is save and download the re-sized image. At the bottom right of your screen you'll see a blue "Save" button. Click this and a menu box will appear. Most likely the save menu will choose the same file format the graphic is already in. In this case we have resized a PNG image so it's suggesting PNG as the save option.
However, because I'm uploading the image as a profile pic I don't want a transparent background (some sites replace transparency with black and you get a distortion in the image). If I save as a JPG a default white background will be applied and I'll get a better upload to my social media page.
Choose JPG from this menu unless you know you need a PNG with a transparent background.
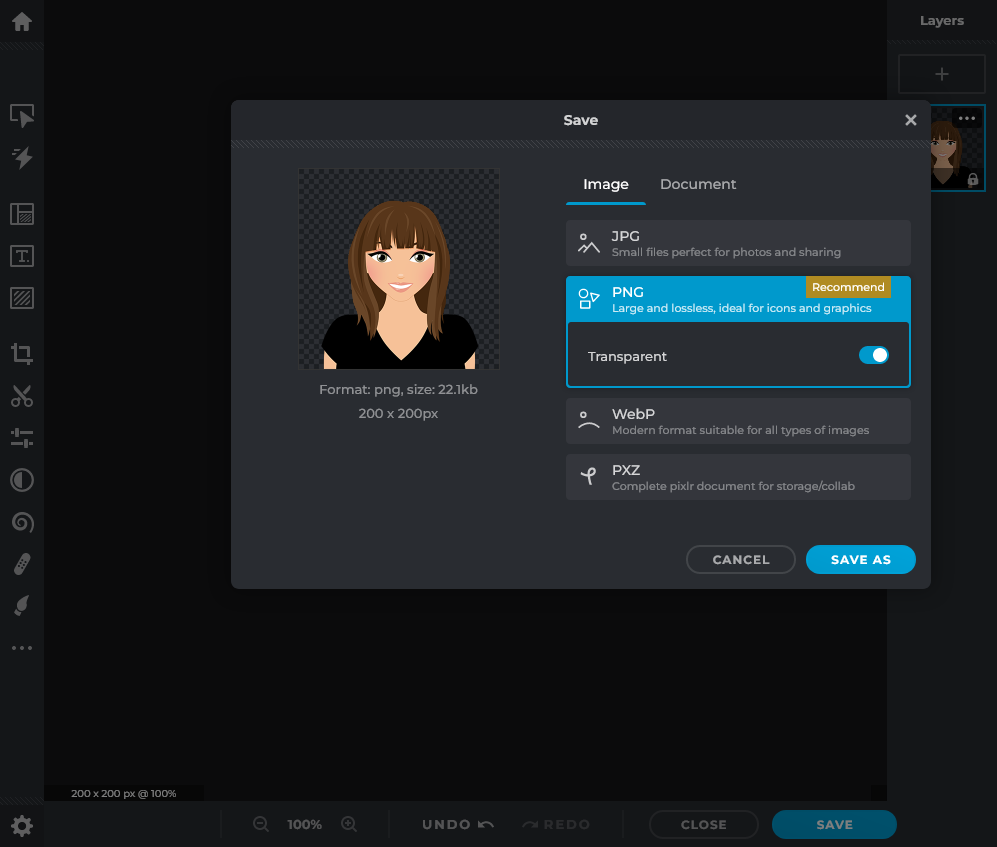
This is what the JPG saving options look like. I'm going to leave all the settings at the default because I want as high a quality as possible.
Now just click save as, rename your file if you want to, click ok and the image will automatically download to your computer's download folder.
Job done!
Happy creating!
Shawnna


Get this freebie of the week! A set of male character graphics, sized at 12" tall and 300 dpi. Perfect for so many projects! Use them in scrapbooking, digital crafts, branding and marketing or create physical goods to sell in your small business.
Tune in every week for a new freebie or sign up to receive the weekly freebies right in your inbox.
⬅ You'll find the email sign up right there in the side bar.
SMALL BUSINESS COMMERCIAL LICENSE - terms of use
Lovelytocu is a graphic design supply shop specializing in cute girly
character clip art. Our pre-made designs are ready to use and the
perfect addition to your small business branding and marketing, social
posts or creative projects with a diverse range of character styles.
Shop the current collection at www.lovelytocu.com and be sure to check out our current offers.
Get creative!
Shawnna


Get this freebie of the week! A set of girly character graphics, sized at 12" tall and 300 dpi. Perfect for so many projects! Use them in scrapbooking, digital crafts, branding and marketing or create physical goods to sell in your small business.
Tune in every week for a new freebie or sign up to receive the weekly freebies right in your inbox.
⬅ You'll find the email sign up right there in the side bar.
SMALL BUSINESS COMMERCIAL LICENSE - terms of use
Lovelytocu is a graphic design supply shop specializing in cute girly
character clip art. Our pre-made designs are ready to use and the
perfect addition to your small business branding and marketing, social
posts or creative projects with a diverse range of character styles.
Shop the current collection at www.lovelytocu.com and be sure to check out our current offers.
Get creative!
Shawnna


For this project we are going to use Canva to quickly and easily create a personalized avatar that you can use as your profile pic on any social channel, shop front or forum.
I'll be using one of my character graphics and adding a pair of eye glasses all on a nice colorful background.
STEP 1:
To begin, let's login to Canva and setup a blank canvas. Because we're creating this to use as a profile pic I'm going with a 4x4" canvas which will size nicely for any site I want to use it on as my profile avatar.
Once logged in, from the home page click the purple button in top right corner "Create a design". In the pop up box at the bottom choose "Custom size". Then just enter the desired dimensions and click "Create new design".

STEP 2:
You will now be in Canva's editor with a blank document. I know I don't want a white canvas in the end, so I'm going to begin by adding a solid background.
Because of the way Canva works though, I'm not going to use the background tool, instead I'm going to use the elements tool and add a color square shape as my backdrop. This is just personal preference because I find it easier to work with.
From the far left side bar click "Elements" and click on the square shape. A solid square should now be in the middle of your blank canvas.

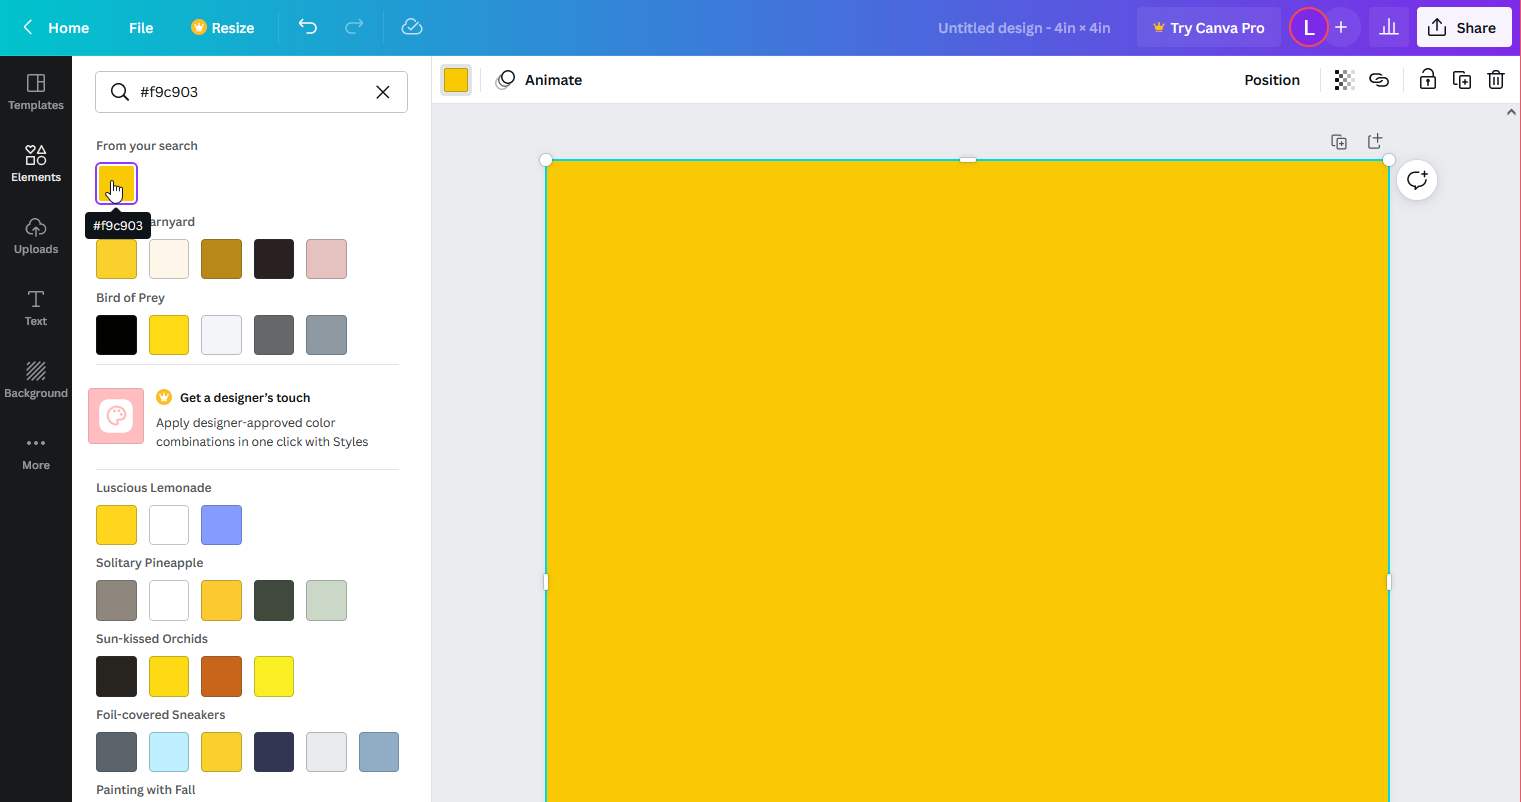
Using the toggle nodes, resize the square so it covers the entire canvas. To change the color click on the color swatch icon in the menu bar above your canvas. This will open a new side panel where you can select as precise a color as you want.
I'm going to use my brand colors and enter a HEX code in the top search box.
STEP 3:
We now want to upload our first graphic, so look to the left hand side bar again and click "Uploads".
Click the purple button "Upload media" and choose the graphic you want to use for your avatar from wherever you've saved in on your computer.
Do the same for all other elements you want to add. In this example I'll just be adding eye glasses.
NOTE: Add the graphics in the order you need them, going from bottom layers to top layers, but if you need to change the order, click on the element you want to move forward or backward and from the menu bar above the canvas click "Position". Then use whichever option you require. (see above)

To add a graphic to the blank canvas just single click on the first graphic from the panel, I'll add the character girl first, and it will be placed in the center of the canvas.
Use the toggle nodes to resize the graphic as desired. I want my girl a bit larger and I'll re-position her at the bottom. I've left enough margin to be able to select my background shape though in case I want to change it.

Looking good so far! Let's do the same and add the glasses, just re-size and position to fit as desired.
That's all I'm going to add. Just quick and simple. To save it, let's download what we've created.
STEP 4:
From the top right hand corner click on the "Share" button. Choose the download option further down the pop up box. We're using the free version of Canva so not all of the save options will be available. That's ok though, we want the high quality PNG so just click the purple "Download" button and the image will be saved in your downloads folder.

While we're still here, I'm going to quickly make some alternate versions by changing up the background color. Just click on the background square and go back into the color palette menu to pick a new color option. Then repeat the download to save.
And that's it! Personalized avatar created.
Happy designing!
Shawnna
PIN ME


